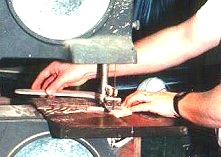
Creating the Trailing Edge of the AirfoilYou
can shape the trailing edge of the airfoil with a rasp or upright belt sander.
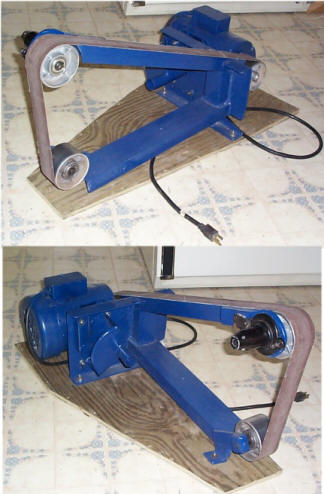
I use a 2x72" belt sander that my Father-In-Law made for me. This picture (far
right) was taken in 2002 when I first got it home. Dad made it from parts of an
old sander and an old motor he had. The top bed is some scrap angle-iron. He
also made a dust collector which attaches to the bottom idler wheel. He was an
inventive genius!
The generic picture to the left is a 1x30 belt sander which
can be used, but does not have the capacity of the larger version. If you
get one of these (or have one already), I recommend you take the table and the
backstop off. This will allow you to move the boomerang around better, and
also allow the belt to flex more.
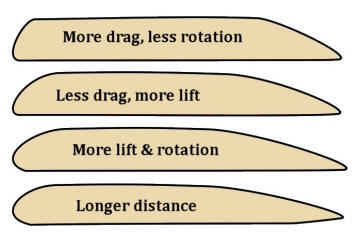
This is the general airfoil you will want to achieve. The block end view
will need to have the corners slightly rounded - depending on what performance
you need or desire. The picture below is from my personal experience with making
boomerangs. Hopefully this will help you make your boomerangs perform properly.
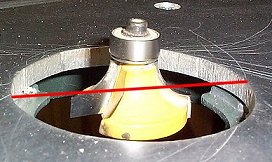
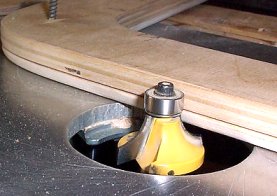
Special Shaping with an airfoil bit
The drawing below is a router bit which my Father-in-law shaped from a
Grizzly Large Thumbnail bit. The gray bearing is a collar which is slipped
over the existing bearing (blue). The blades were reshaped to create the
desired slope of the airfoil. A picture montage of the original bit is
seen on the right with the added bearing collar before it was
 retooled
with a green wheel.
retooled
with a green wheel.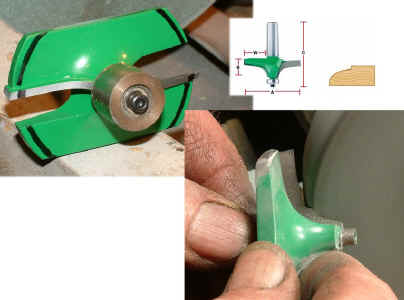
A person with machinist skills can retool a
bit for this purpose, but it is not for the faint-of-heart. Sears used to
sell a bit which was made for raised panels, but they no longer seem to have
them in stock. Contact me for more information about shaping the airfoil
with a router bit. I may have better information than what is provided
here.

Of course, once a boomerang is shaped, and sanded, you have
to put on the finish. I usually use spray cans with stencils to get
artistic designs. (Not exactly as
depicted in the graphic to the left. I actually have a less complicated
process.) If you ever get a chance to visit the Quad Cities, don't
hesitate to contact me. I would be very happy to show you my shop and
teach you how to make boomerangs for yourself. NO CHARGE!!

 Making
boomerang blanks with a Router
Making
boomerang blanks with a Router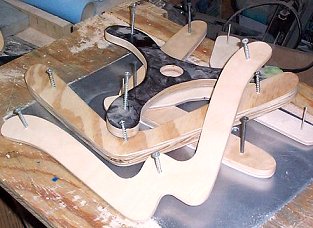 Or
right-click on the link to download the pattern to your computer. (choose "save
target as..." from the pop-up menu - may be different for your browser.)
Or
right-click on the link to download the pattern to your computer. (choose "save
target as..." from the pop-up menu - may be different for your browser.) 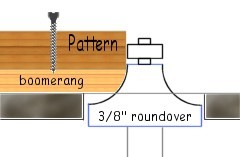